
WooCommerce Shipping with Delivery Area
Important: this plugin belongs to the Timerys company here: https://timersys.com/plugins/woocommerce-map-delivery-area/
Some e-commerces are not send orders to district or neighborhoods, else these has delivery areas predefined and limited where they need shipping prices to each of them.
We give you 2 solutions
- Draw your delivery areas ( free plugin )
- Set to shipping price to this areas ( premiun plugin )
Delivery Area using Google Maps
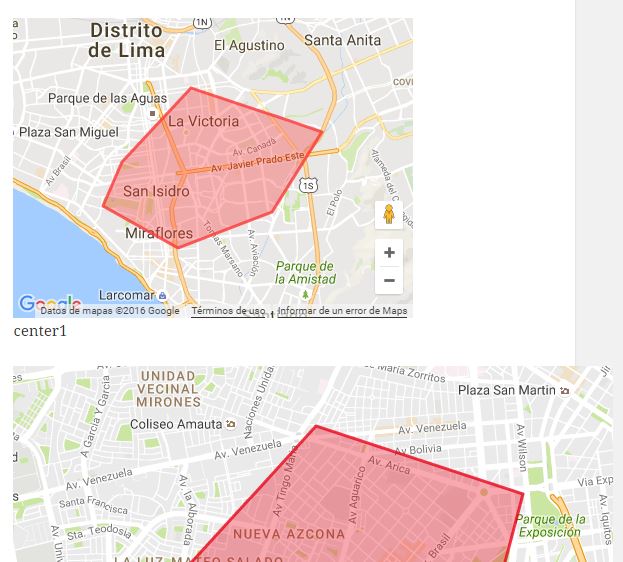
This is a free plugin that you can found in the WordPress Respository and it allows drawn several delivery areas using Google Maps. Besides you can put these areas in a or several pages by shortcode.
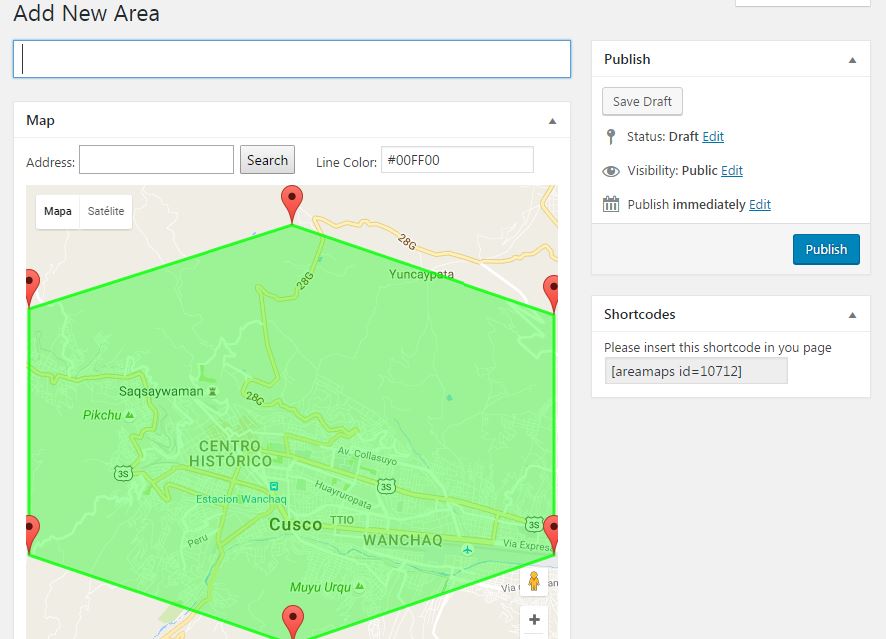
In the admin area you can draw a polygon moving markers and using the zoom: if you do click in the map, appears a marker, if you leave press the click, you can move the marker and, if you do click in a marker, it disappear.
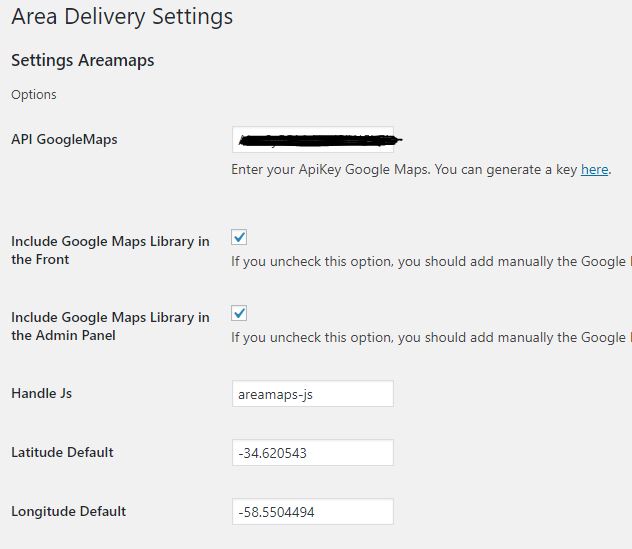
In the settings page you can set your Google Api Key, your default coordinates, choose if the Google Maps Library will be called in the admin/front or it will be put manually and the handle JS name.
Google Maps Library is not called in all the pages of your site, this library will be called only when you put the shortcode. But if your theme or some plugin calls the Google Maps Library in the front in all the pages then you must uncheck “Include Google Maps Library in the front” because it can be the reason of a duplicity error, but your must change the name handle JS and put the handle that calls to Google Maps Library because other scripts depend of this library.
Finally, you can put those delivery areas in your pages by shortcode [areamaps id=”$ID”] , where $ID is the post ID. You can put several map in a single page if you want.
[bws_button name=”Download Plugin” type=”radius” link=”https://goo.gl/uXhkdx” class=”alert linkb” target=”blank” icon_class=”download” icon_size=”medium” size=”large”] [bws_button name=”Demo” type=”radius” link=”https://goo.gl/PpnV9B” class=”primary linkb” target=”blank” icon_class=”results” icon_size=”medium” size=”large”]
Woocommerce Shipping with Delivery Areas
This premiun plugin takes the Delivery Areas drawn with the free plugin explained in the point 1 and put a shipping price to each of them. Besides, you can set to minimum purchase and put a default shipping price or avoid the purchase if the customer is not inside of any delivery area.
Settings Page
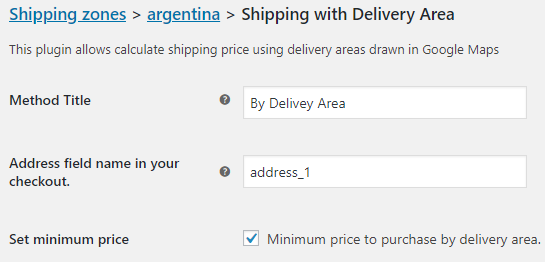
First you need to create a shipping zone and assign it this shipping method. Then you can customize it with these options.
By default the address name in your checkout page is {billing_/shipping_}address_1 , if you need to change the name to other field, you can do but don’t add the prefix, only the name. Besides, you can choose if you need to set a minimum price or not for each area.
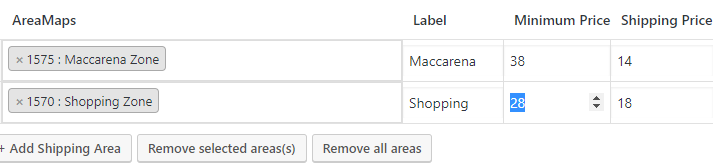
You can choose one or several areas and put a message (label), your shipping prices and minimum price. You remember that it will take the first coincidence.
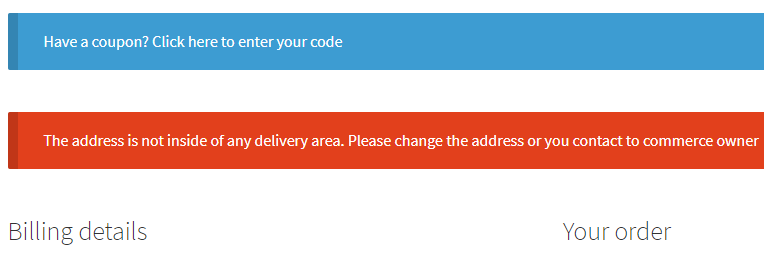
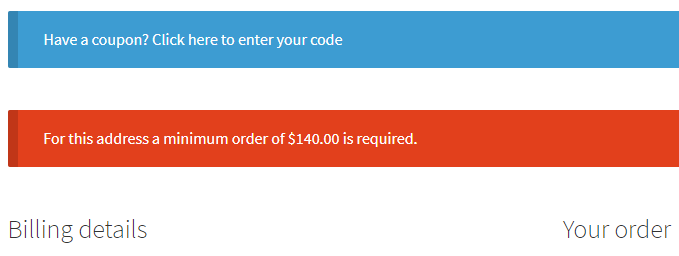
And finally, if your customer is not inside any delivery area you can put a default shipping price or avoid the purchase with a message.


These messages will appear when your customer put his address ( country, state, city, postcode, address_1 ), it will take the present fields in the checkout page to create the address.
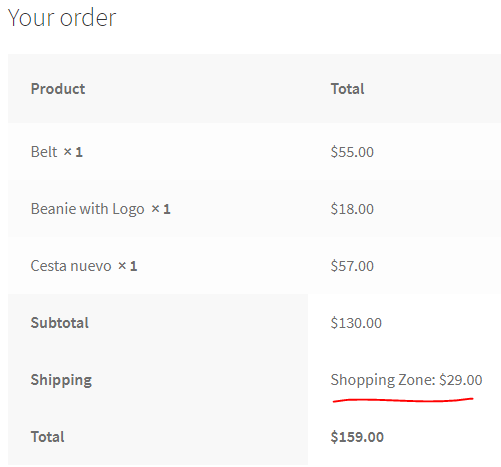
Order Review
In the front will appear the shipping price, and it will update the price each time the customer change the address.
[bws_button name=”Download Plugin” type=”radius” link=”https://goo.gl/kuDS6n” class=”alert linkb” target=”blank” icon_class=”download” icon_size=”medium” size=”large”] [bws_button name=”Documentation” type=”radius” link=”https://goo.gl/RenGzj” class=”primary linkb” target=”blank” icon_class=”results” icon_size=”medium” size=”large”]